
- Posts: 143
Installing Frsky M9 Gimbal into Walkera Devo12S
- jejeg
-
- Offline
Less
More
11 Dec 2017 20:54 #66454
by jejeg
Replied by jejeg on topic Installing Frsky M9 Gimbal into Walkera Devo12S
Thank you ; I will order the "Frsky M9 classic model
I ordered a friend the impression of platinum
I ordered a friend the impression of platinum
- pulpfiction15
-
- Offline
Less
More
- Posts: 86
30 Dec 2017 18:13 #66648
by pulpfiction15
Replied by pulpfiction15 on topic Installing Frsky M9 Gimbal into Walkera Devo12S
Hi,
Succesfully made the mode, all went smoothly, only at the end to remount the sidesliders, a little sanding was needed.
Thanks richardclli for the tuto and the file of the parts.
Started this rainy afternoon at 14:00 and at 18:00 all was finnished.
Succesfully made the mode, all went smoothly, only at the end to remount the sidesliders, a little sanding was needed.
Thanks richardclli for the tuto and the file of the parts.
Started this rainy afternoon at 14:00 and at 18:00 all was finnished.
- jejeg
-
- Offline
Less
More
- Posts: 143
31 Dec 2017 17:37 - 31 Dec 2017 17:42 #66650
by jejeg
Replied by jejeg on topic Installing Frsky M9 Gimbal into Walkera Devo12S
Hello
one more ....")
Thank you all .

one more ....
Thank you all .
Last edit: 31 Dec 2017 17:42 by jejeg.
- sar315
-
- Offline
Less
More
- Posts: 6
11 Feb 2018 04:24 #67462
by sar315
Replied by sar315 on topic Installed gimbals on Devo 10
Successfully installed gimbals on Devo 10.
Used only 2 big printed parts. Had to cut off a little bit so they fit.
Didn't use 3d printed "pressure plates". Instead everything together using glue E6000.
Had to trim some plastic from gimbals where they go under top central transmitter board.
Also removed one screw from one of gimbals. Cut off some connector legs from underside of top transmitter plate, otherwise it was touching gimbals.
Also had to rotate ALL four magnets.
Also had to extend 2 set of wires - one on each gimbal, otherwise they didn't reach connectors.
See picture.
- saidem
-
- Offline
Less
More
- Posts: 216
13 Feb 2018 17:44 #67494
by saidem
Replied by saidem on topic Installed gimbals on Devo 10
Hello,
Can you tell me if it's easy to turn the magnets and how to adjust?
Can you tell me if it's easy to turn the magnets and how to adjust?
- sar315
-
- Offline
Less
More
- Posts: 6
13 Feb 2018 18:36 #67499
by sar315
Replied by sar315 on topic Installed gimbals on Devo 10
First of all it is much easier to rotate and adjust magnets when gimbals are not glued or screwed into transmitter.
But of course they should be plugged it.
I've mistakenly already glued gimbals into TX and had to drill small holes in sides of TX to access screws then hold magnet in place (left and right ones, top and bottom ones were accessible)
So it is not a big deal if you did glued gimbals in.
See photo in attachment.
Magnets are under assembles (small circuit board and plastic casing) circled in red.
You need to remove 2 screws to lift each assembly. Screws are marked by red arrows for top assembly.
Left assembly screws are not visible on this photo because they are covered by long metal flat springs.
But they are accessible.
After removing two screws, lift assembly. Now you will see the magnet. It is where green arrow points to.
You'll need to loose (no need to remove completely) another screw that holds magnet in place.
Rotate magnet 180 degrees (using small pliers or something like that), put back assembly (no need to screw it back, just hold it there),
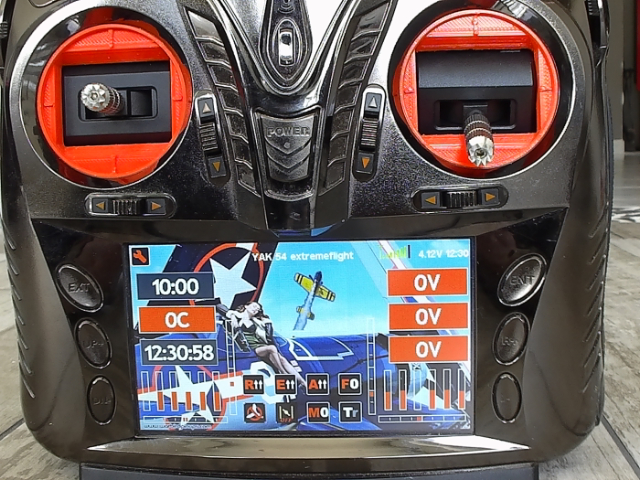
switch on TX, remove all trims and see what values are displayed when sticks are centered.
(for now it is better to keep throttle spring in place so that it auto centers the stick)
You want to see as close to 0 as possible.
In my case I was getting up to +/- 20.
Now you need to adjust magnet position - remove assembly , loose screw that hold magnet in place, rotate magnet little bit,
put everything back see the values. Keep doing it until you reach desired result.
I was able to adjust everything to 0 and 1 after about 3-5 attempts.
But of course they should be plugged it.
I've mistakenly already glued gimbals into TX and had to drill small holes in sides of TX to access screws then hold magnet in place (left and right ones, top and bottom ones were accessible)
So it is not a big deal if you did glued gimbals in.
See photo in attachment.
Magnets are under assembles (small circuit board and plastic casing) circled in red.
You need to remove 2 screws to lift each assembly. Screws are marked by red arrows for top assembly.
Left assembly screws are not visible on this photo because they are covered by long metal flat springs.
But they are accessible.
After removing two screws, lift assembly. Now you will see the magnet. It is where green arrow points to.
You'll need to loose (no need to remove completely) another screw that holds magnet in place.
Rotate magnet 180 degrees (using small pliers or something like that), put back assembly (no need to screw it back, just hold it there),
switch on TX, remove all trims and see what values are displayed when sticks are centered.
(for now it is better to keep throttle spring in place so that it auto centers the stick)
You want to see as close to 0 as possible.
In my case I was getting up to +/- 20.
Now you need to adjust magnet position - remove assembly , loose screw that hold magnet in place, rotate magnet little bit,
put everything back see the values. Keep doing it until you reach desired result.
I was able to adjust everything to 0 and 1 after about 3-5 attempts.
- saidem
-
- Offline
Less
More
- Posts: 216
14 Feb 2018 16:46 #67515
by saidem
Replied by saidem on topic Installed gimbals on Devo 10
Thank you for all this information, as soon as I have the opportunity, I'll do it, I have all the equipment and I'll let you know.
- Gbaquero
-
- Offline
Less
More
- Posts: 3
17 Feb 2018 21:41 #67562
by Gbaquero
I'm also interested in the parts for the Devo8S, my original gimbal has a lot of use
Many Thanks!!!!!!!!!!!!!!!!
Replied by Gbaquero on topic Installing Frsky M9 Gimbal into Walkera Devo12S
richardclli wrote: I am quite busy these few weeks. I will continue to work on Devo8S when I have spare time. I think the gimbals would fit in Devo8S even better than Devo12S, however the 3D printing parts need to be modified.
I'm also interested in the parts for the Devo8S, my original gimbal has a lot of use
Many Thanks!!!!!!!!!!!!!!!!
- Hobee
-
- Offline
Less
More
- Posts: 5
12 Jun 2018 11:07 #69618
by Hobee
Replied by Hobee on topic Installed gimbals on Devo 10
Thanks for the description. This looks very good. I love my Devo 10, but a while ago it fell on the sticks and they are sometimes a tiny bit notchy, which drives me insane. So I went ahead and bought the M9 gimballs and will try my luck.
One question, you wrote that you did not use the pressure plates. Didn't they fit or why?
Thanks,
Tobias
One question, you wrote that you did not use the pressure plates. Didn't they fit or why?
Thanks,
Tobias
- Hobee
-
- Offline
Less
More
- Posts: 5
13 Jun 2018 14:48 #69629
by Hobee
Replied by Hobee on topic Installing Frsky M9 Gimbal into Walkera Devo12S
richardclli, thanks a lot for sharing the 3d model! I am very excited to get this started.
This is the first time ever I have something 3D printed, so I am a little bit confused by the options. So material is ABS, but which layer height do I have to choose? 100 μm, 200 μm or 300 μm?
Thanks!
This is the first time ever I have something 3D printed, so I am a little bit confused by the options. So material is ABS, but which layer height do I have to choose? 100 μm, 200 μm or 300 μm?
Thanks!
- richardclli
-
Topic Author
- Offline
Less
More
- Posts: 199
14 Jun 2018 02:27 #69637
by richardclli
Replied by richardclli on topic Installing Frsky M9 Gimbal into Walkera Devo12S
Well, that depends on what do you want, thinner layer can give better finishing and you need more time to print. I choose ABS because it can stand a higher temperature. Think about that when you playing the heli and stay under sun and the material becomes soften..........
- sar315
-
- Offline
Less
More
- Posts: 6
17 Jul 2018 04:56 #69891
by sar315
They don't fit right away, and glue keeps front gimball parts good enough.
Replied by sar315 on topic Installed gimbals on Devo 10
One question, you wrote that you did not use the pressure plates. Didn't they fit or why?
They don't fit right away, and glue keeps front gimball parts good enough.
Time to create page: 0.304 seconds